How to Export Markdown as an Image (PNG)
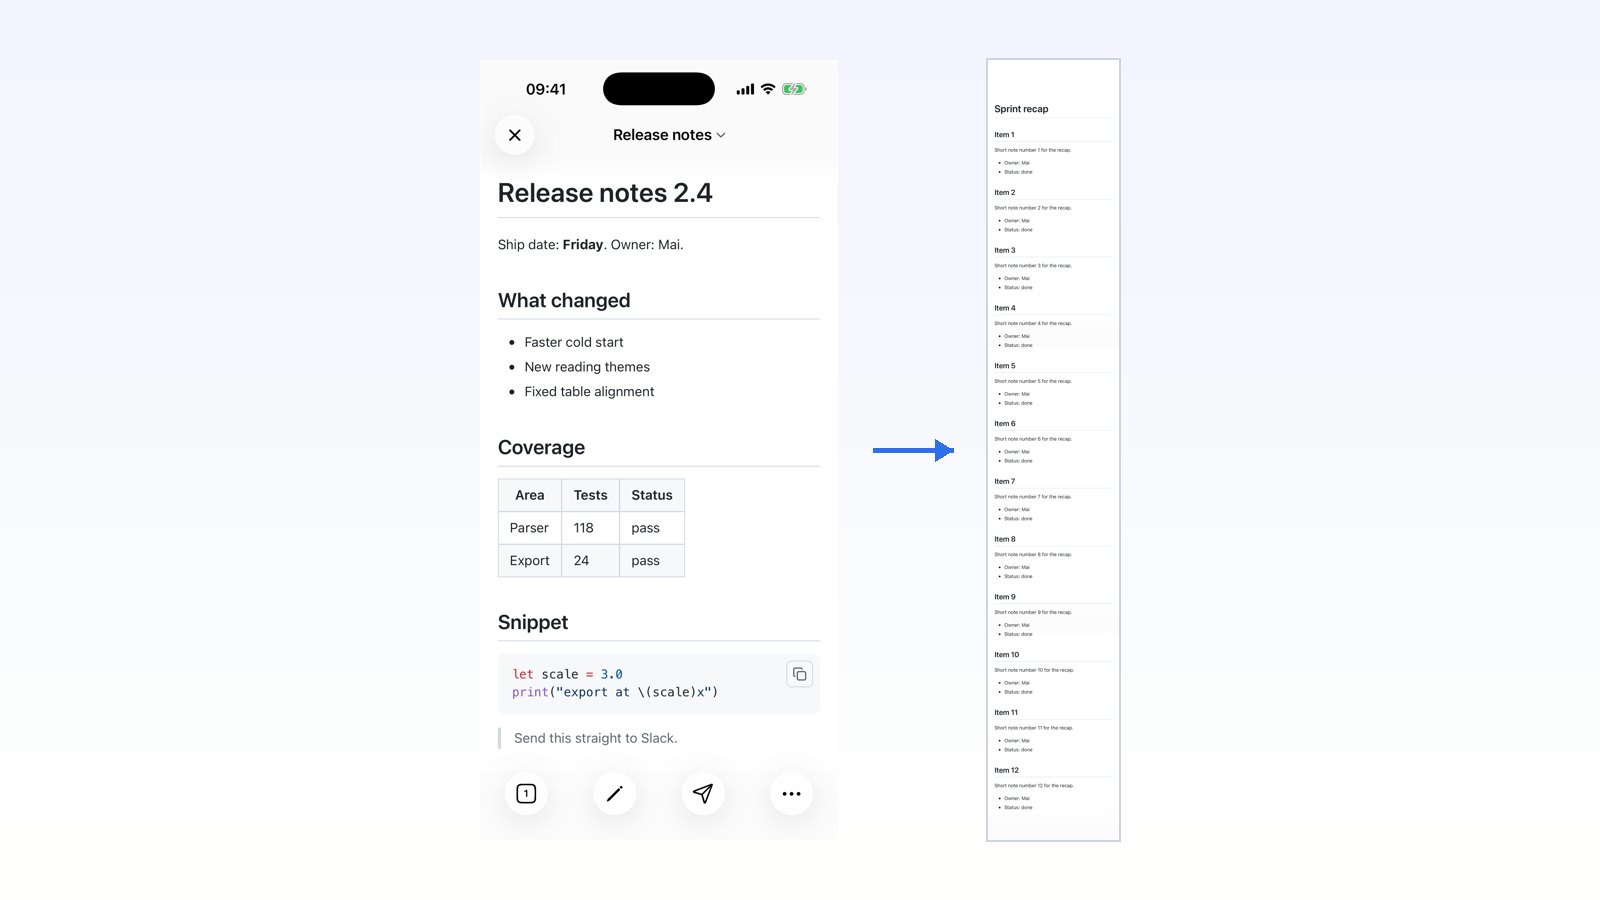
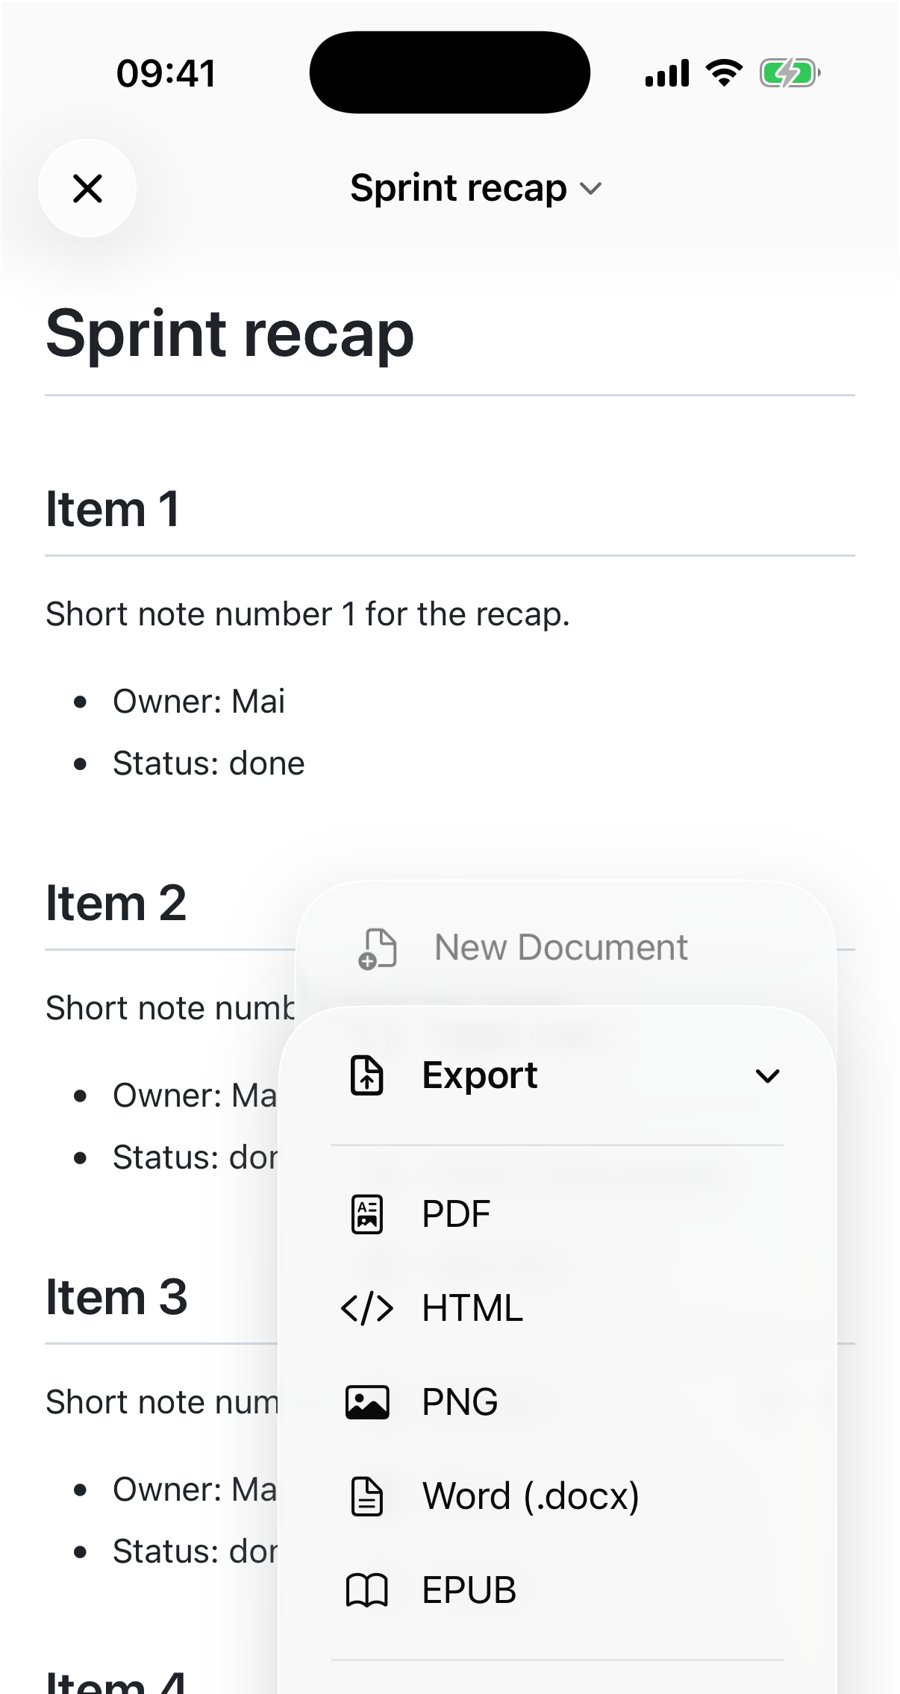
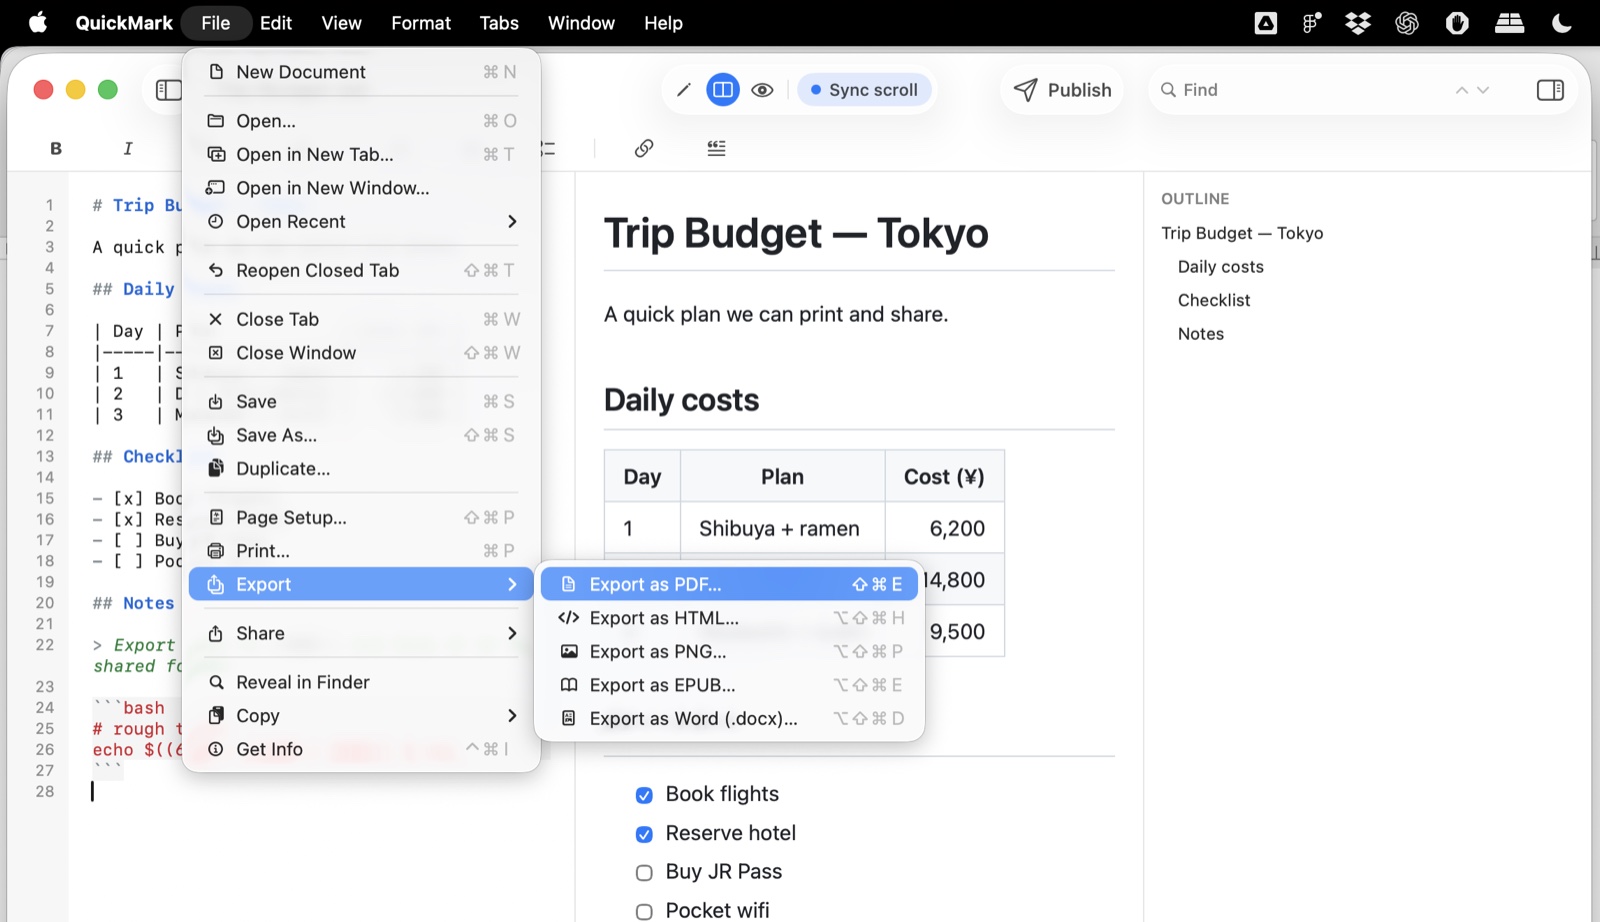
To turn a Markdown file into an image, open it in QuickMark and choose File ▸ Export ▸ Export as PNG… on a Mac, or press ⌥⇧⌘P. On an iPhone or iPad, open the export menu and pick PNG, then send it wherever you like. You get one image of the whole document, not a screenshot of the part that happened to be on screen.
Why export an image at all
Markdown is text, and most places you want to paste it will not render it. Slack renders some of it. A GitHub issue renders most of it. A Keynote slide, a Figma board, a Jira comment, an Instagram story or a message to a client renders none of it, and your carefully aligned table arrives as a wall of pipe characters.
An image sidesteps the question. Whoever receives it sees exactly what you saw, with the table borders, the syntax colours and the spacing intact, on a device that has never heard of Markdown.
The trade is obvious and worth saying out loud: nobody can select the text, search it, or click a link inside it. When any of that matters, PDF or HTML is the better export.
On iPhone and iPad
On iPhone the export menu lives behind the … button in the bottom toolbar, under Export. On iPad it gets its own button in the top bar.
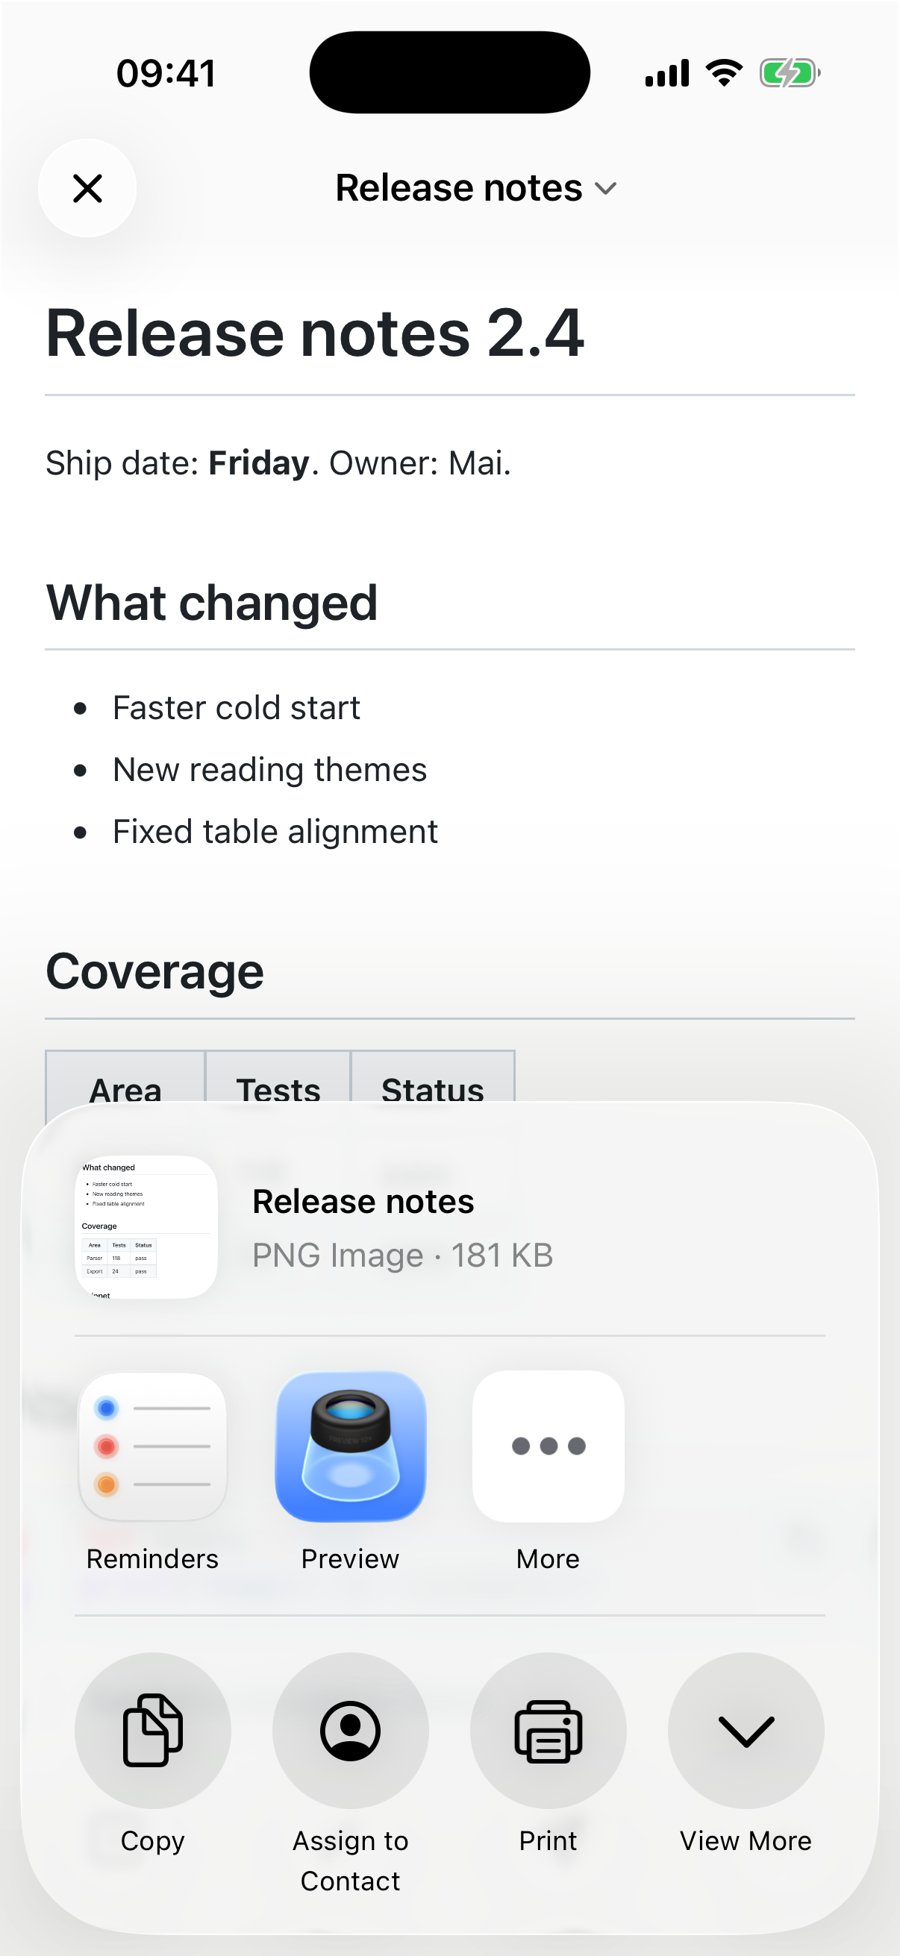
There is no save dialog on iOS, so the finished image arrives at the share sheet. From there it is Save to Files, AirDrop, Messages, Mail, or straight into another app. The share sheet names the file after your document and tells you the size before you send it anywhere.
One catch: the export items are disabled while you are in the pure editor view, because the image is made from the rendered page. Switch to preview or split view first and they light up.
On Mac
Everything sits under File ▸ Export, and PNG carries ⌥⇧⌘P. You get an ordinary save panel titled "Export as PNG", so you pick the folder and the filename yourself.
It captures the document, not the window
This is the part that separates an export from pressing the screenshot keys. The app measures how tall the rendered document really is and captures all of it.
To check rather than assume, I exported a note with twelve sections on an iPhone 17 Pro simulator and measured the file. The result: 1206 by 7128 pixels, 469 KB. The phone's screen is 2622 pixels tall, so that single image is about 2.7 screens of content with no seam you would notice and nothing cut off at the bottom.

The width is fixed to the width of the preview, at your display's real pixel density. On a 3x phone that is 1206 pixels across; on a Mac the image is rendered from the document's vector layout and rasterised at 3x as well, which is why text in the PNG stays crisp when someone zooms in rather than turning into the soft, slightly smeared text you get from upscaling a screenshot.
If you like pixel-peeping: the iPhone export is assembled from viewport-tall bands, and at the joins the page background shifts from 255 to 252 on the brightness scale. That is a 1% difference. I only found it by sampling pixel values, and you will not see it in Slack.
Four things to know before you rely on it
- Long documents make very tall images. There is no page splitting, by design. A twenty-page document becomes one enormous PNG, and some chat apps will squeeze it into a thumbnail so narrow the text is unreadable. Past a few screens of content, PDF is the more sensible format.
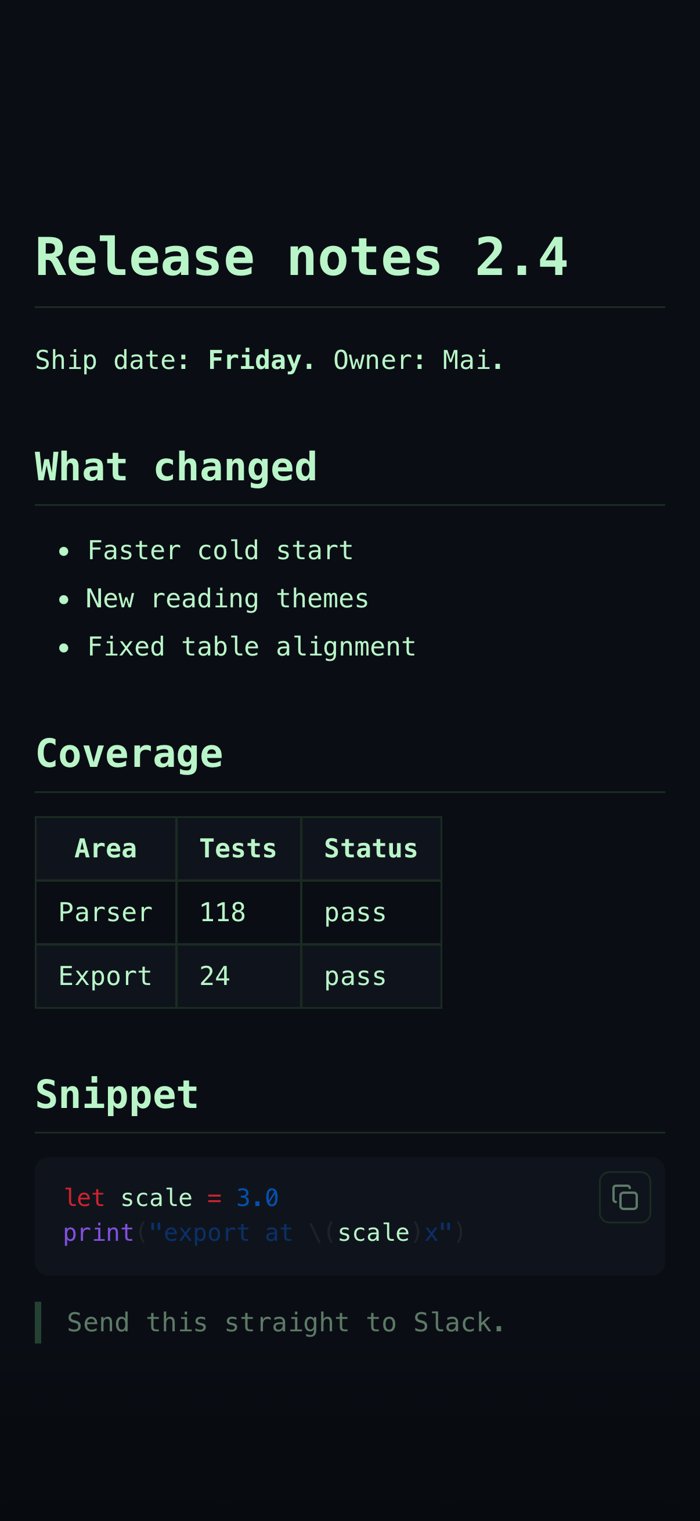
- Dark reading themes still export dark. The export forces the light colour palette, the same way the HTML export does, so a dark-mode reader does not accidentally hand out a black image. But the reading theme you picked is left alone, and Terminal is dark by design. I exported the same note with Terminal selected and the file came back with a near-black background, measured at RGB 10, 14, 20. That is the intended behaviour, not a bug, and it is genuinely useful when you want a dark code-style card. Just do not expect a light image while Terminal is on.
- Code blocks keep their copy button. The little copy-to-clipboard square in the corner of a code block is part of the live page, and the PNG is a picture of the live page, so it comes along. The HTML export strips it; the image export does not. It reads as a UI detail in an otherwise clean picture.
- There is no size or scale setting. You get the preview's width at 3x and that is it. If you need a specific pixel width for a slide or a social post, resize the exported file afterwards.
What survives the trip
Because the image is taken from the page you were already reading, everything visible in the preview is in the file: tables with their borders, task-list checkboxes, blockquotes, KaTeX formulas as laid-out maths, Mermaid diagrams as drawn diagrams, and syntax-highlighted code in whichever of the 36 code themes you have set.
Nothing is re-rendered for the export and nothing is converted, which is exactly why so little goes wrong. What you see is what gets saved.
Get rendered Markdown previews everywhere
QuickMark is a free, native Markdown app for Mac, iPhone & iPad, with live preview, export, and publish built in.
Download on the App Store or try the live preview in your browser →