How to Print a Markdown File Cleanly
To print a Markdown file on a Mac, open it in QuickMark and press ⌘P. On iPhone or iPad, tap … then Print…. You get the rendered page on paper, not the raw # and | characters. One thing decides whether it comes out crisp or washed out, and it is not in the print dialog: the theme you were reading in.
Why printing Markdown normally goes wrong
Print a .md file from a text editor and you print the source: hashes, pipes, asterisks, and a table that is only a table if you squint. Fine for you. Not fine for the person you handed it to.
The fix is to print what the preview draws, not what the file contains. That is what QuickMark does on both platforms. It hands the rendered page to the system print engine, so headings are headings, tables have borders, and task-list checkboxes are drawn boxes.
Two details fall out of that design, and both are worth knowing before you send a job to a printer.
Print from the light theme
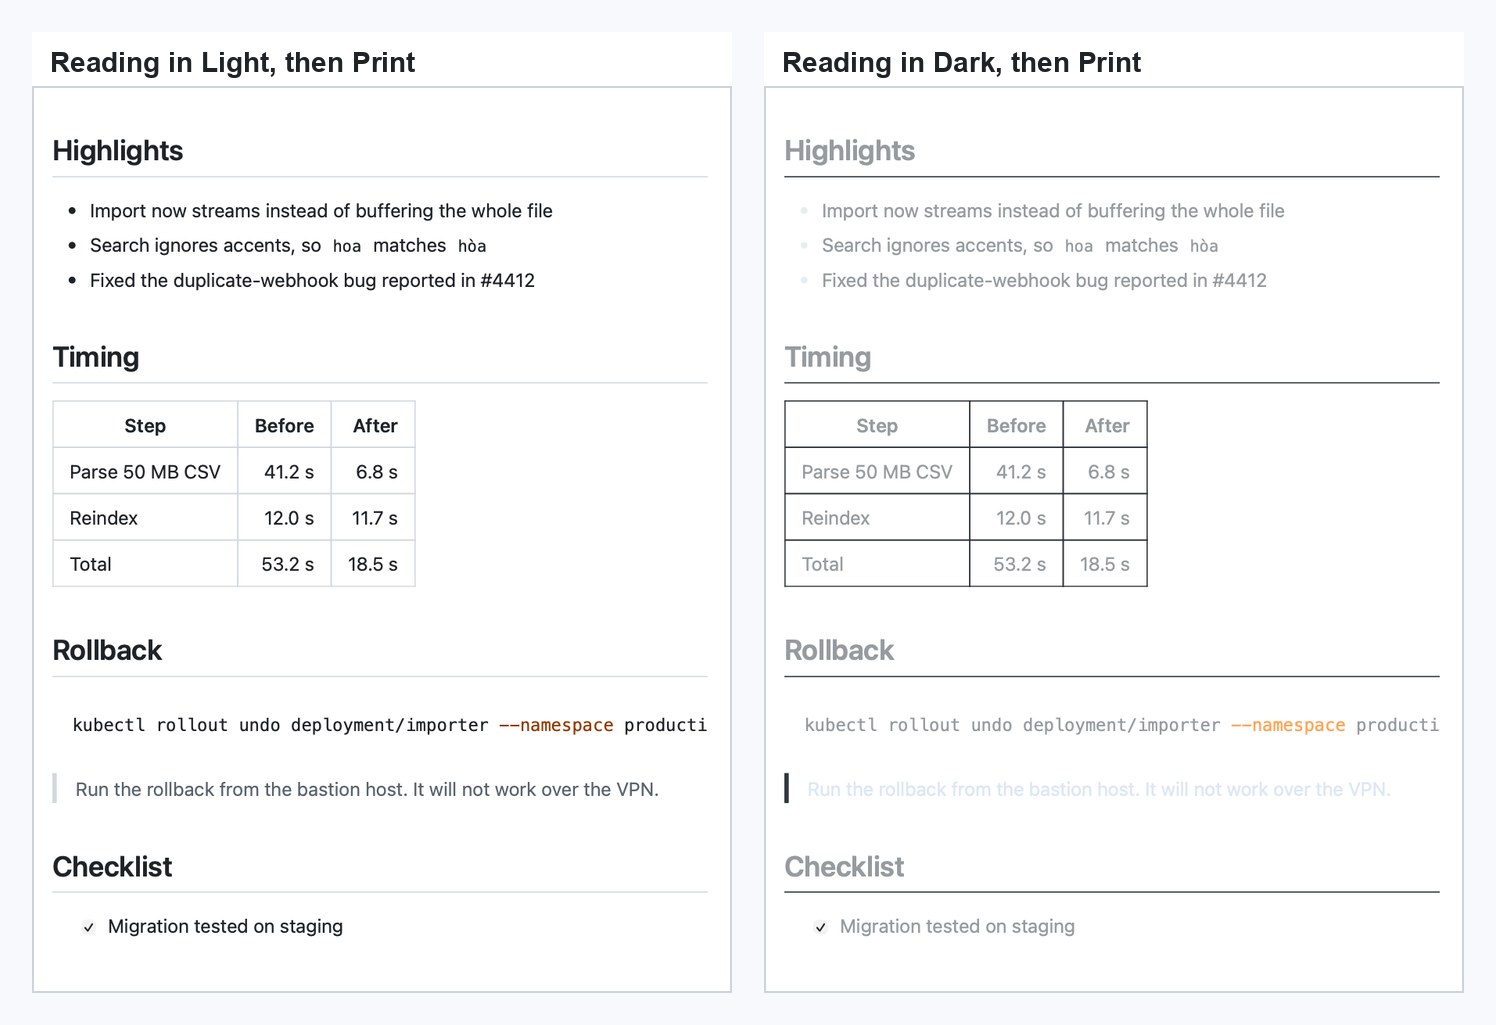
The renderer has exactly one print-specific CSS rule, and all it does is hide the hover copy buttons on code blocks. There is no rule that forces a light page for printing. So the print job inherits whatever colours you were reading in.
What happens next is a quirk of how WebKit prints. The dark background is dropped, because printers do not flood a page with ink. The light text stays light. You end up with pale grey on white.
I measured it rather than guessed. Printing the same document twice, once from each theme, and counting pixels dark enough to read comfortably on the first page:
- Printed from Light: 10,953 readable dark pixels.
- Printed from Dark: 2,719. Four times less ink where it matters.
The blockquote is the worst casualty. Its text is a soft blue that reads beautifully on a dark screen and nearly vanishes on paper.
The same thing happens on iPhone. Here is the print preview from the same document with the phone in each mode:
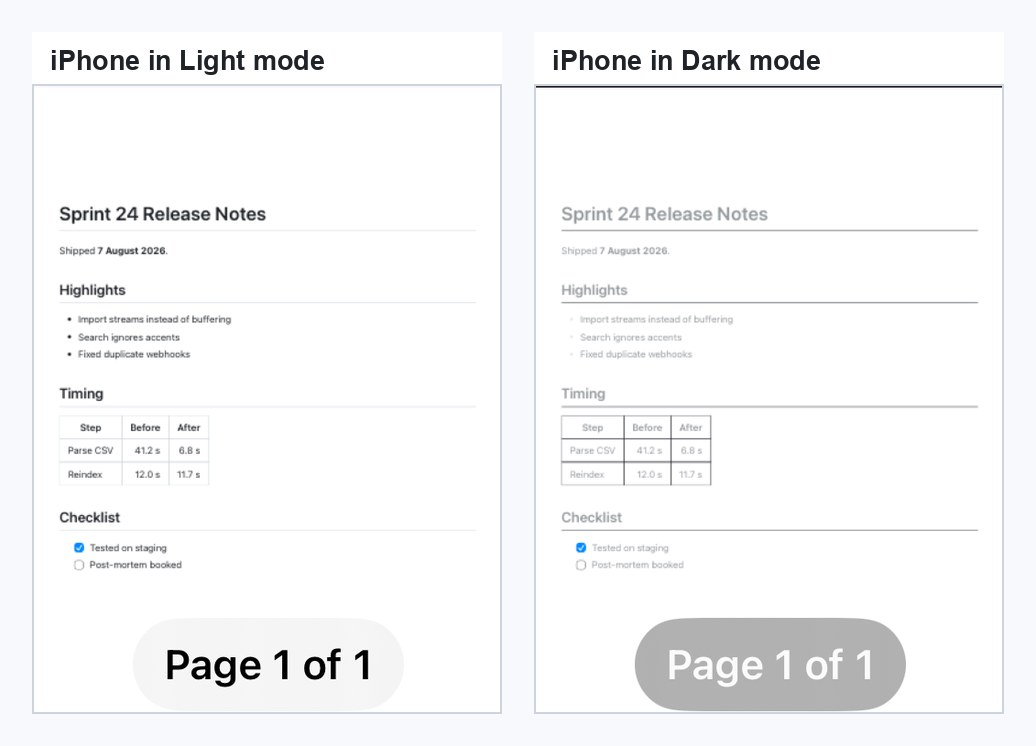
So: switch to the light theme before you print. On Mac that is Settings ▸ Appearance; on iPhone and iPad it is the gear icon ▸ Appearance. Worth noting that this only applies to printing. Exporting to PDF is different: that path deliberately forces the document to light for the duration of the export and puts your theme back afterwards, so a PDF export always comes out readable no matter what you were reading in. If you want a file rather than paper, exporting as PDF sidesteps the whole issue.
Wide content gets cut off, and orientation is the fix
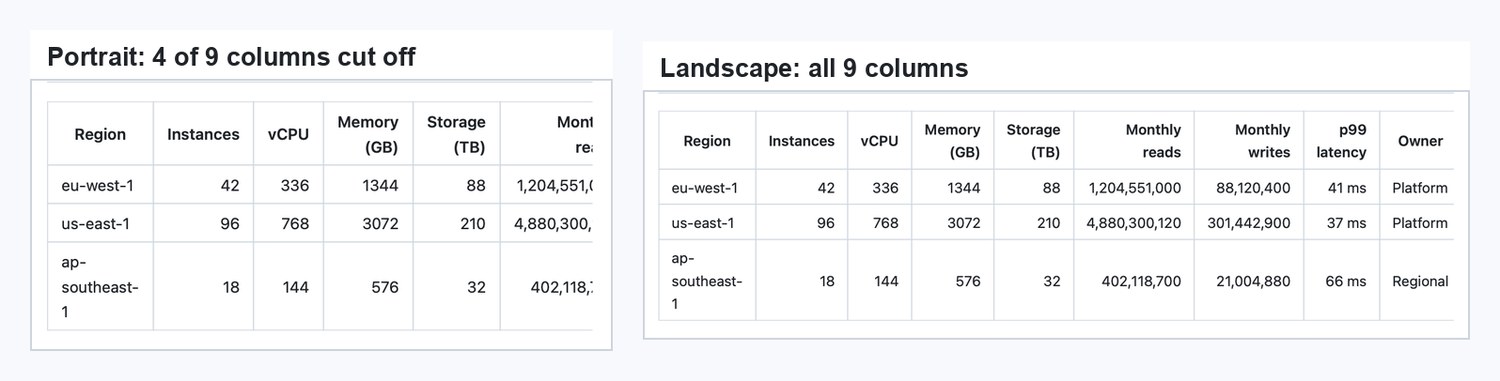
The second thing to know: content wider than the page does not wrap or shrink. It is cut at the right margin.
A nine-column table printed portrait lost four columns. Not squeezed, not continued on another sheet. Gone.
Long code lines behave the same way. A one-line kubectl command in the test document was truncated in the printed output at --to-revisi, and the rest of the command is not just invisible, it is not in the file at all. I pulled the text layer out of the printed page to check.
Two things fix it, and only one of them is the obvious one:
- Switch to landscape. This works. A wider sheet gives the layout a wider page to fill, so more columns fit. It rescued all nine columns above.
- Turning the scale down does not work. I printed at 60% and got exactly the same truncation, character for character. Scaling shrinks the rendered page after layout, so the content is smaller but cut in the same place.
If a code line is genuinely long, the reliable answer is to break it in the source with a trailing \, or to accept the cut. Wrapping long code lines in the printed output is not something the app does today.
Printing on Mac
Both items sit in the File menu: Page Setup… at ⇧⌘P and Print… at ⌘P.
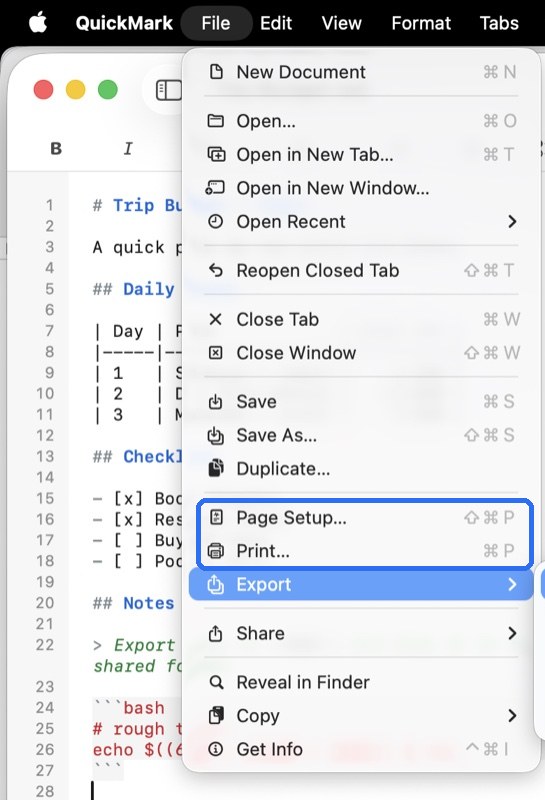
The print dialog opens expanded, with a live preview plus paper size, orientation and scaling inline. That matters because of the section above: switching to landscape is one click in the dialog, with no trip to Page Setup. Most apps hand you the collapsed panel that only offers copies and page range.
Page Setup is still there when you want it, and its choices carry over. It writes to the shared system print settings, so a change there affects the next print and the next PDF export.
One small thing in QuickMark's favour: no header or footer is added. Print a web page from a browser and you usually get the URL and a timestamp stamped in the margins. The printed page here carries only your document.
Printing on iPhone and iPad
Tap … in the bottom toolbar, then Print…. It is free of any quota, same as on Mac. The item is greyed out while you are in pure editor mode, since there is no rendered page to print yet. Switch to preview or split first.
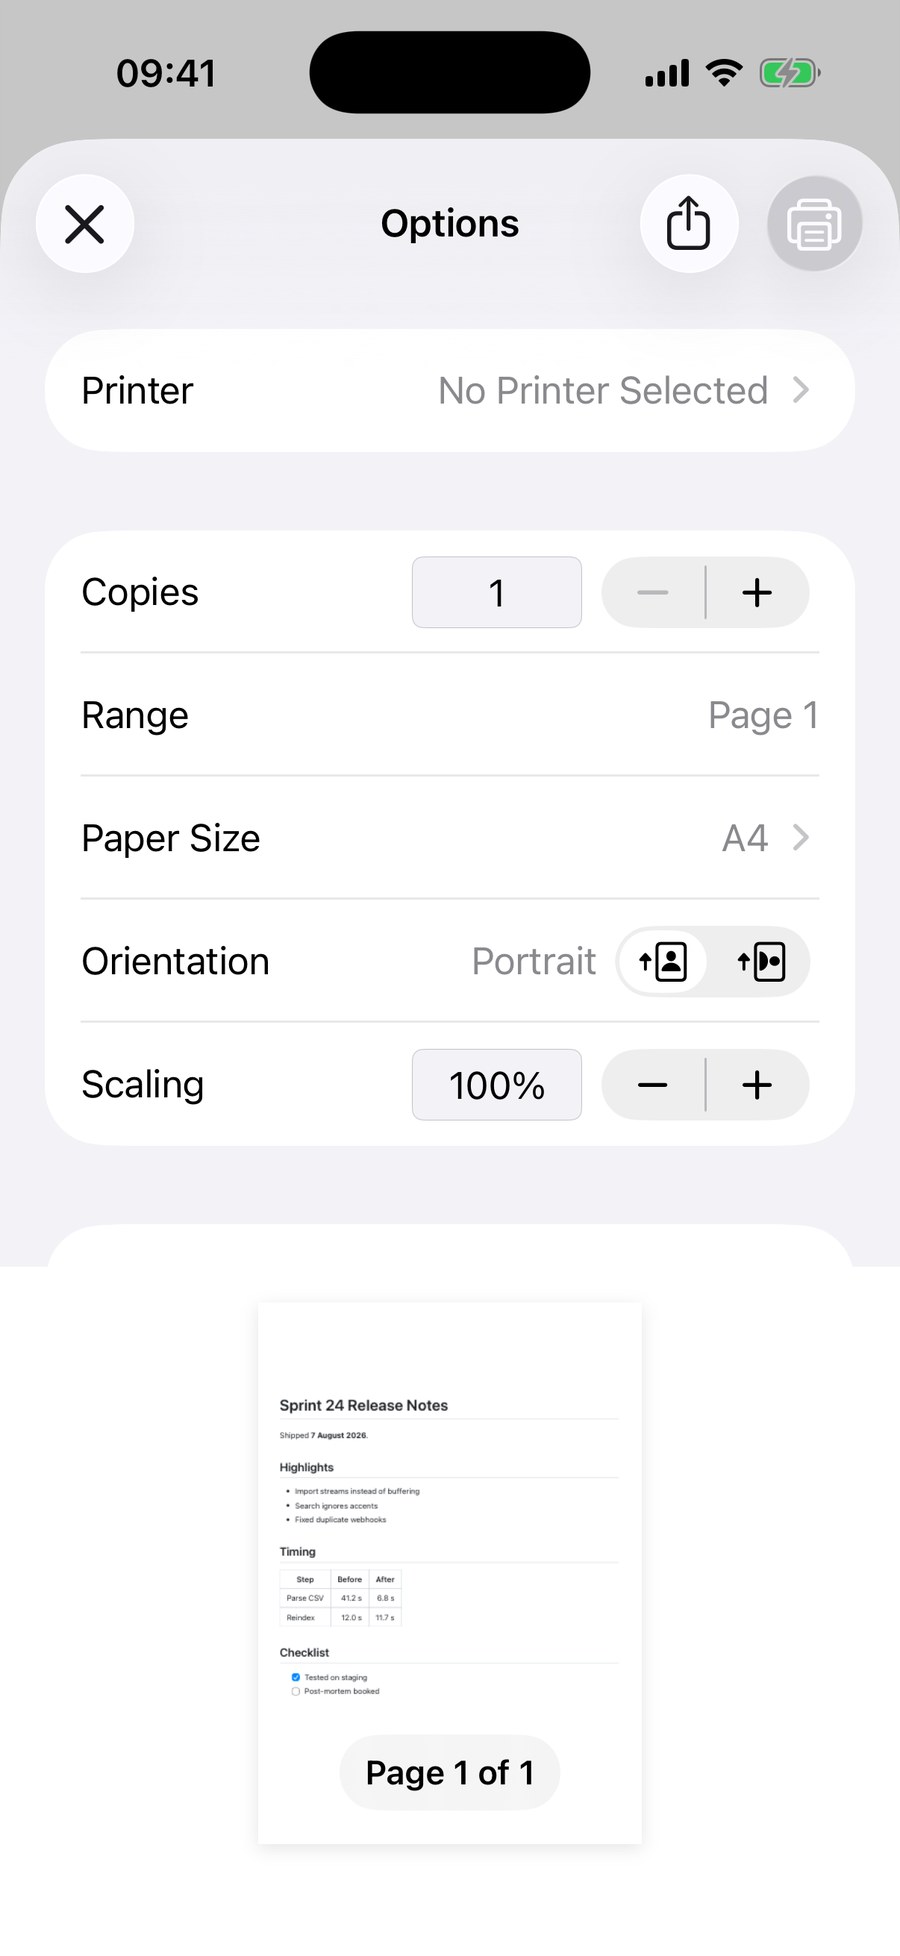
The share button in the top-left corner of that sheet is useful even with no printer around: it hands you the print job as a PDF you can save to Files or send on.
The short version
- Mac: ⌘P. iPhone and iPad: … ▸ Print…
- Switch to the light theme first. Printing from dark gives you pale grey on white.
- Wide tables and long code lines are cut at the right margin. Landscape fixes it; the scale control does not.
- Copy buttons are stripped automatically. No headers, no footers, no URL in the margin.
- Want a file instead of paper? Export as PDF handles the theme for you, and there is also HTML and PNG.
Get rendered Markdown previews everywhere
QuickMark is a free, native Markdown app for Mac, iPhone and iPad. Live preview, export and publish built in.